In part 1, I mostly ignored this console as I honestly believed that it was not worth the trouble. It was extremely dirty, covered in brown ‘sludge’ and rust with signs of years of mis-storage. I gave it a bath while cleaning the joysticks just to see how it would turn out.
After washing and being hung out to dry for a while I briefly tried it using the RF output on my test TV – no joy, there was something there, but it was too distorted to make out a picture.
I put it to one side again…..
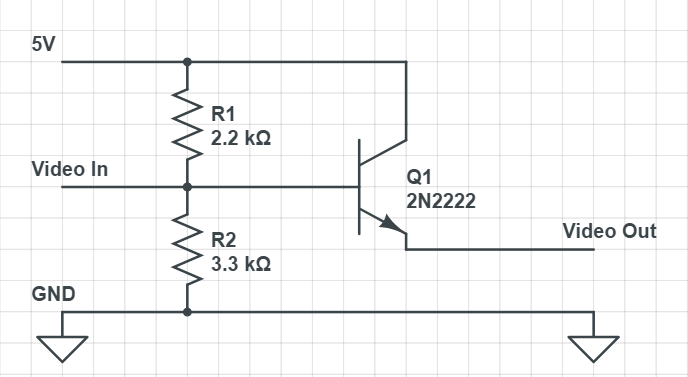
Then my new soldering iron arrived…. happy days…I needed something to solder. I decided to build a composite mod board and recap the Atari, just to see if it would work.

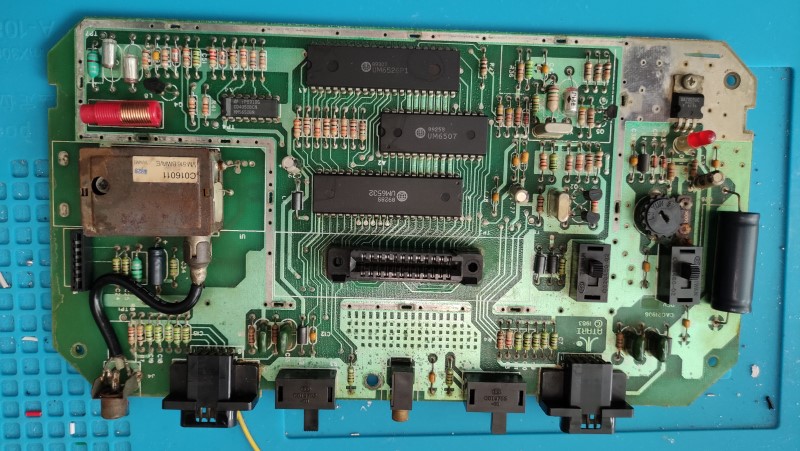
The composite board is very simple to build, two resisters and a transistor and I followed the ‘The Future was 8-bit‘ guide to fit.
I also decided to change the main 2200uF capacitor which turned out to be a good plan as it was >30% out of spec when I tested it out of the circuit.
With all these changes finished I tentatively inserted centipede and turned it on….
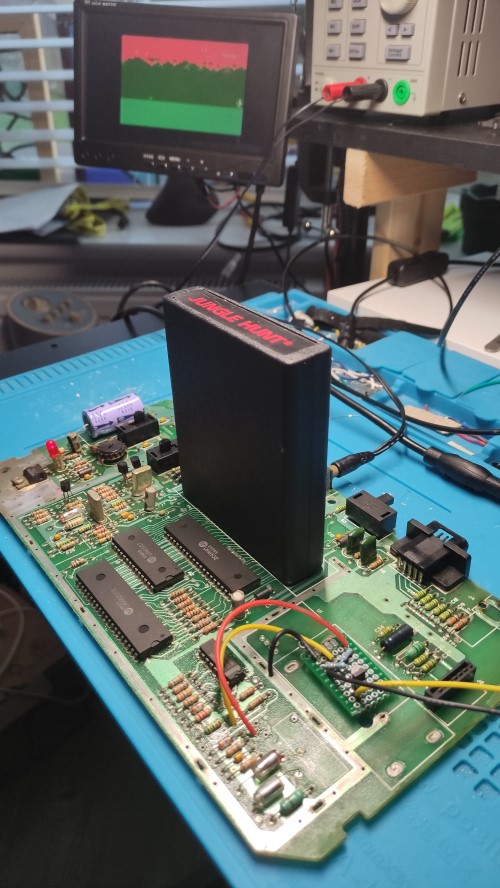
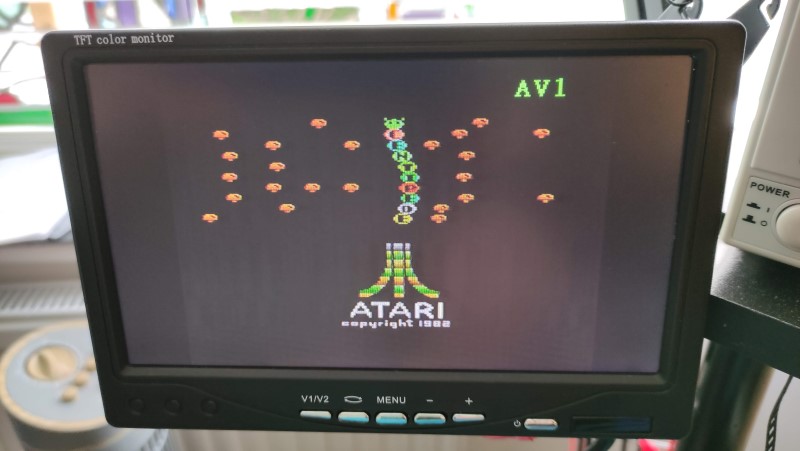
Would you believe it, we have a working console – these things are indestructible. The experts reading this might notice that the colours are slightly wrong, I tried altering the colour variable resistor with no change; I noticed that it seemed to be ‘oozing brown gunk’ still oowww…. So I assume that it’s faulty and have ordered a new one. In the next update, I’ll rebuild the console and add the new RCA sound and video outputs – along with changing the variable resistor.